Migrating Using Lift & Shift
You can use the Lift & Shift tab on the Migrations page to complete a migration automatically. When you run an automatic migration, you cannot modify any of the elements of the system.
Note
Refer to Migrating Using Re-platform if you want to modify the machine before migration.
The automatic migration process includes the following steps:
- Scan the source machine.
- Generate a machine image from the scan result.
- Publish the generated machine image to the selected target environment.
Launching an Automatic Migration
All pre-requisites listed in the section Migration Pre-requisites are also applicable to Lift & Shift migration.
In order to run a migration:
- Go to the
Lift & Shifttab on theMigrationspage.- Click on the
migratebutton on the top right.
- Enter the name of your migration.
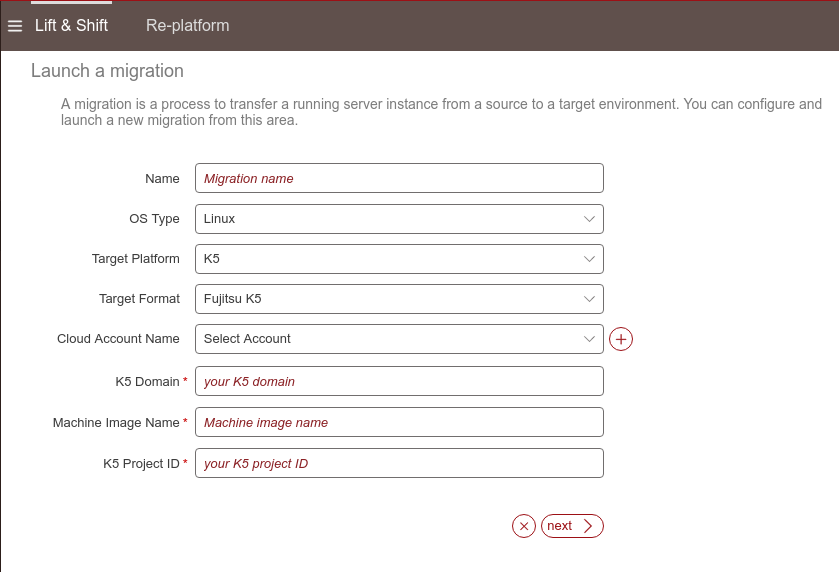
- From the drop-down menu select the target platform and type. Enter all other required fields, based on the target you have selected.
- Click
next.- Follow the instructions on the UForge AppCenter pop-up window.
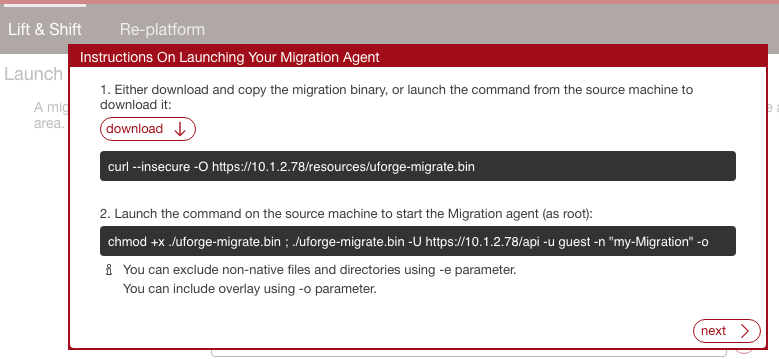
Download binary locally by clicking
Download.Copy the binary on the source environment you want to migrate.
Open a terminal window and login to the source environment.
Launch the migrate command on the running source environment to start the migration.
Note
For Linux migration, you can exclude non-native files and directories using
-eparameter. The-oparameter will include the overlay (this option is used by default). The overlay is all the things that are missing compared to a known state (a previous scan of a machine or the operating system native packages). This overlay is a standard tar archive.Click
nextto view the migration status.You can return to the
Lift & Shiftpage to view the status of your migrations.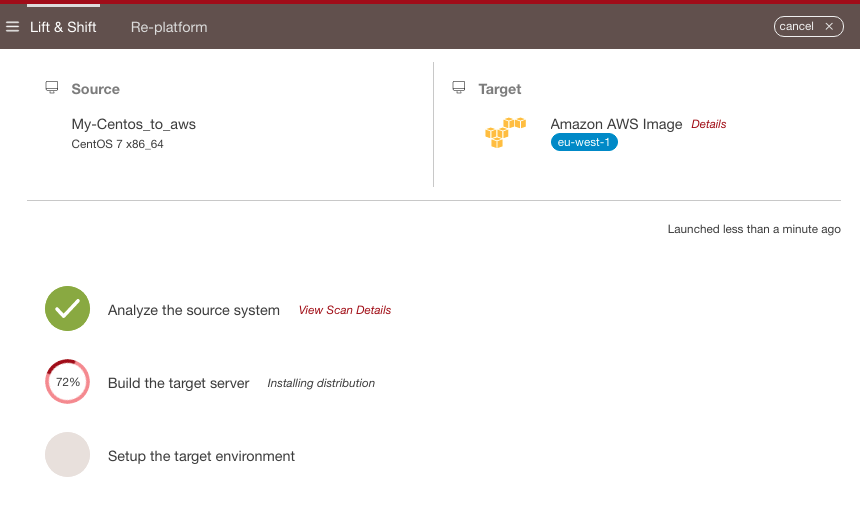
Note
You should note that if you cancel a migration, this will stop the process of migration at the step currently being done. Therefore, for example, if the image generation is complete, it will be visible on your platform. Also, if publication has started, this may incur costs. You should check your cloud account. For more details on the constraints of publishing an image, refer to Publishing a Machine Image.
From the status page you can view more detailed information about the scanned instance. Refer to Viewing Details of an Automatic Migration.
Viewing Details of an Automatic Migration
Once your automatic migration has completed, you can view the details of the status and details of the machine migrated from the Lift & Shift tab on the Migrations page.
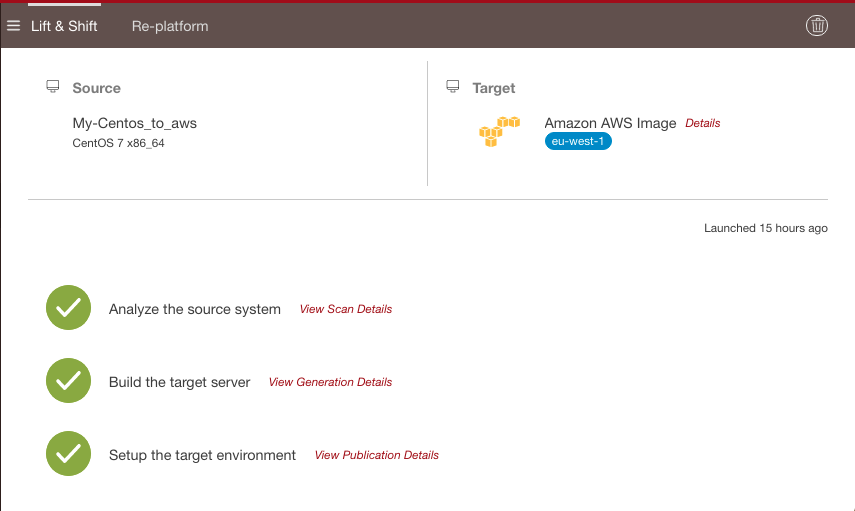
From the status page you can view more detailed information about the appliance scanned by clicking:
Detailsfor more information about the published appliance. This will include the cloud ID, cloud account used for publication, if the publication succeeded.View Scan Detailswhich will bring you to the details of the scan appliance on theRe-platformpage. From here you can see all the packages and files that are part of the appliance.View Generations Detailswhich will bring you to theGenerationspage. This page lists ALL generations (not just from this migration). From here you can launch a publish.View Publication Detailswhich will bring you to theGenerationspage.